
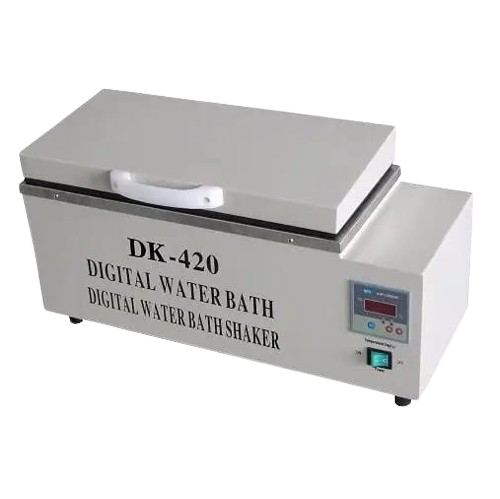
What is a laboratory water bath?
A laboratory water bath is a heated container of water used to incubate samples at a constant, controlled temperature. It provides gentle, uniform heating for tubes, flasks and other lab vessels and is used for warming reagents, incubating biological samples, melting/softening media, thawing, enzyme reactions and many routine lab procedures.
Common features
- Stainless-steel chamber — durable, easy to clean.
- Heater and thermostat (digital or analog) — set and maintain temperature (PID digital controllers are common).
- Temperature range & accuracy — many baths run from just above ambient up to ~99–100 °C; accuracy often ±0.1–1 °C depending on model.
- Circulation / shaking options — some have internal circulation pumps or orbital shaking for faster, more uniform heat transfer.
- Lid — reduces heat loss and evaporation.
- Drain valve / tap — for easy water removal.
- Sample racks / floats — removable holders to keep tubes upright and prevent direct contact with the heater.
- Timer / alarms / over-temperature cut-off — safety and automation features.
- Insulation and viewing windows on some models.
- Cooling capability on refrigerated circulating baths (for sub-ambient work).
Typical uses
- Incubating biological samples (e.g., 37 °C for cell/enzymes).
- Thawing frozen samples or melting agar/gel.
- Heat inactivation or enzyme reactions.
- General sample warming prior to assay.
Safety & important cautions (read before use)
- Never put flammable or volatile solvents (ethanol, acetone, hexane, etc.) in a water bath — use a dry block heater instead.
- Wear PPE (lab coat, heat-resistant gloves, eye protection).
- Avoid sealed, closed containers at high temperatures — pressure can build and cause rupture.
- Use distilled or de-ionized water to prevent mineral build-up and corrosion.
- Do not overfill (risk of spills) or operate with the water level below the minimum mark (heater damage).
- Follow your lab’s decontamination rules if biological samples are used.
Step-by-step procedure — safe, standard workflow
Quick checklist before starting: bath on level surface; drain valve closed; chamber clean; distilled water available; sample containers suitable for heating.
- Place the water bath on a stable, level bench and plug into a properly grounded outlet.
- Fill with water. Add distilled/deionized water up to between the MIN and MAX level marks (do not exceed MAX). If your protocol needs a specific liquid level (e.g., mid-height of tubes), adjust accordingly.
- Close the lid (or partially close) to reduce evaporation and speed up temperature control.
- Power on and set temperature. Use the bath’s control panel to enter the desired temperature. If precise temperature is critical, monitor with an external calibrated thermometer or probe.
- Allow the bath to reach and stabilize at set temperature. Confirm temperature using the built-in display and/or an independent thermometer placed in the water. (Do not rely solely on the set value for critical assays.)
- Prepare samples. Use appropriate tube racks, floats or holders. Ensure caps are secure but not airtight if gas expansion is possible. Use secondary containment for biohazardous samples.
- Place samples in the bath. Use a rack or float to prevent direct contact with the heater or sides. Make sure sample labels remain readable and above waterline if required.
- Start timer / monitor. Set the timer or note the start time. Periodically check that temperature is stable and water level is adequate.
- Remove samples safely. Use tongs or heat-resistant gloves. Be careful of condensed water on tube lids.
- Turn off / finish. If you’re done for the session, switch off the unit. If the bath will not be used for some time or is contaminated, drain and clean it (see maintenance below).
After-use cleaning & routine maintenance
- Daily/weekly: change water regularly (frequency depends on use; change more often if incubating biologicals).
- Descale: remove mineral deposits with mild acid (e.g., diluted vinegar or manufacturer-recommended descaler) per instructions — rinse thoroughly.
- Disinfecting: follow your lab’s policy. Avoid continuous use of corrosive disinfectants (they can damage metal). Use manufacturer’s recommended biocide if available.
- Inspect: check seals, drain valve and power cord; ensure the heater and controller function normally.
- Calibration: verify temperature accuracy periodically with a calibrated thermometer; recalibrate per institutional schedule.
Quick troubleshooting
- Bath not reaching set temp: check power, water level, thermostat setting; circulation pump (if present) may be off.
- Temperature fluctuates / uneven: circulation may be failed or blocked; lids left open; overcrowded samples.
- Foaming / contamination: change water, clean interior, use anti-foaming agent only if recommended.
- Leakage: check drain valve and seals; do not operate until fixed.
Short SOP / quick-start summary
- Check unit and fill with distilled water to correct level.
- Set temperature and close lid. Verify with an independent thermometer if needed.
- Place samples in rack; submerge to recommended depth (not beyond cap line).
- Start timer; monitor temperature intermittently.
- Remove samples using gloves/tongs; turn off and clean if required.